Sunday, May 20, 2012

Card share ...

Sorry for going MIA for a while.  I'm still adjusting to the new job ... not working from home anymore since I don't have anymore evening calls or receive 20-30 emails the next morning :)  We've been in meetings in Saguenay last week and will be going back for the next 3 weeks.  Hopefully, I'll be sleeping better than the last couple of weeks.  The new job has definitely allowed me to do things out of my comfort zone!

Here's a card that I've been trying to get done for sometime now.  Initially, I planned to work on it during my vacation.  Since my vacation was cut in half, I didn't have time to work on it.  At first, I was going to make a bunch of onesie into cards ... one for each team member.  Unfortunately, I didn't get the text from everyone, so I decided to make a regular card.


My colleague and I also got some gifts from the Montreal Canandian's store ... yup, we're trying to turn Mia into a HABs fan early on ;)  I re-package everything to give it a more personal touch and to reduce the size of the package we were sending through.  The original package was quite big!

Here's the original packaging:


This is what I did with a plastic container my stamps came it ... recycling!  I added some ribbon and a tag ... et voilĂ !


I didn't have a box for the botties, so I made a box ...

Saturday, April 7, 2012

Yaay, one down ...

Well, finally finished my brother's thank you cards ... yaay, one down one more to go!  Decided not to go to my mom's today, so I could finish them.  Got the pictures from my brother about a week and a half ago, but I didn't start on things until yesterday.  I've been on vacation since last week and been taking it easy ... more like recovering from the craziness of work.  It was really busy before I left on vacation since I was trying to finalize and transfer things before going on vacation as I'll be starting a new role when I get back.

I finished the thank you cards yesterday and printed the envelopes this morning.  It's all pack and ready to go.  I guess we'll be dropping it off next weekend when we go to my mom's.  I've also been working on Mei Mei's thank you cards while waiting for my brother's pictures.  She actually gave me her pictures last month ... the bulk of the work is done ... just waiting for 2 things before I can finish them off.  This gives me a chance to finalize a few things for the thank you ... hopefully, I'll get them completed before she gets back to me :)

Thursday, March 29, 2012

Another card ...

I was asked to make a card for someone leaving the company, where there would be 40-60 people signing.  It took me a bit of time to figure out what to do.  I didn't really know the person well.  The only thing I knew was I wanted to use the 12.25"x9" peach coloured envelope.

Initially, I thought I would die cut the sentiment "Tu vas nous manquer ..." (translation: We'll miss you ...) and put flowers around it.  The sentiment was quite large, so the card would be bigger; and I would need to make the envelope instead, which was fine.  However, I didn't like the way it look; and with the size, it would be tight or too much space for 40-60 people.  So, it was back to the drawing board ... I started looking at my stamps again, and it came to me ... thankfully as I just had the weekend to do this :)

I decided to go back to the peach envelope and used one of my other Stacy Stamps sets.  First, I printed the sentiment on glossy paper.  The glossy paper allow the ink to stay on the surface, so I could cover it with embossing powder ... not sure you could see this.


I stamped the large tulips from the stamp set and coloured the tulips pink and peach colour, so it would match the envelope.  I use 2 different green colour pencils for the leaves.  Then used the odourless solvent and paper stomps to blend ... see I was not kidding when I said I love this technique :) 


I added a couple of matching butterflies that I colour a while back and a dash of glitter ... and there you go!  Sorry, I was at a weird angle and the colour of the picture isn't the best. 

Saturday, March 24, 2012

Another birthday card ...

Here's another birthday card share.  For some reason, I associate purple with the person this card is for ... don't know why.  Anyways, I did the purple and green combo ... I like those 2 colours together ... so the decision of what colours to use was easy.  I went through my stamps a bit before finding the right one.  I have a few flower stamps by Stacy Stamps and decided to use the large stamp from the Snapdragon set.  I coloured the flowers with colour pencils and used odourless solvent and  paper stumps to blend ... I know I keep saying this, but I really do love this technique :)


When I stamped the sentiment I didn't put enough pressure on the left, so part of the "B" was a bit light.  I didn't want to redo everything, so I used my Momento marker and went over the word "Birthday".  I left "Greetings" the way it was ... it gave the card some extra dimension.  I don't think what I did is too noticeable.

Saturday, March 17, 2012

Birthday Card ...

Initially, I was going to post this in early March.  However, I've been so busy at work that I've been really vegging out during the weekends.  Before I forget ... Tiffany, thanks for the card!  Love getting cards especially handmade ones :)

Here's the card I made for my good friend's birthday at the end of February.  BTW, she's lucky she doesn't age as quickly as the rest of us as her birthday comes every 4 years :)  Initially, I had plan to make a step card.  However, it somehow changed along the way.  I'm still happy with the way it turned out.  It's not as simple as the usual cards I make ... however, I don't think it's overdone.


Here's a close up of the card and the inside.  I repeated the same design inside and wrote my message.

Thursday, February 23, 2012

More quick cards ...

Here's a couple more quick cards ... I decided to combine pattern paper and a matching piece of cardstock.


This one was done while preparing the care package for Tiffany ... sorry for the bad lighting.  Since I had the embossing folders and die out, I figure I'd make a card with the stuff since it was out.  Nothing fancy ... best part is I got to use 2 of the gazillion flowers I have! 


Monday, February 20, 2012

Care package ...

Cool ... just read that Tiffany got the package, so I can post this now.  It arrived quicker than the post office said!

Decided to put together a craft care package for Tiffany.  No clue what she has, so I figured I'd take a guess and send her some things she may not have ... however, if she has something like it already, one can always do with more, right? :)

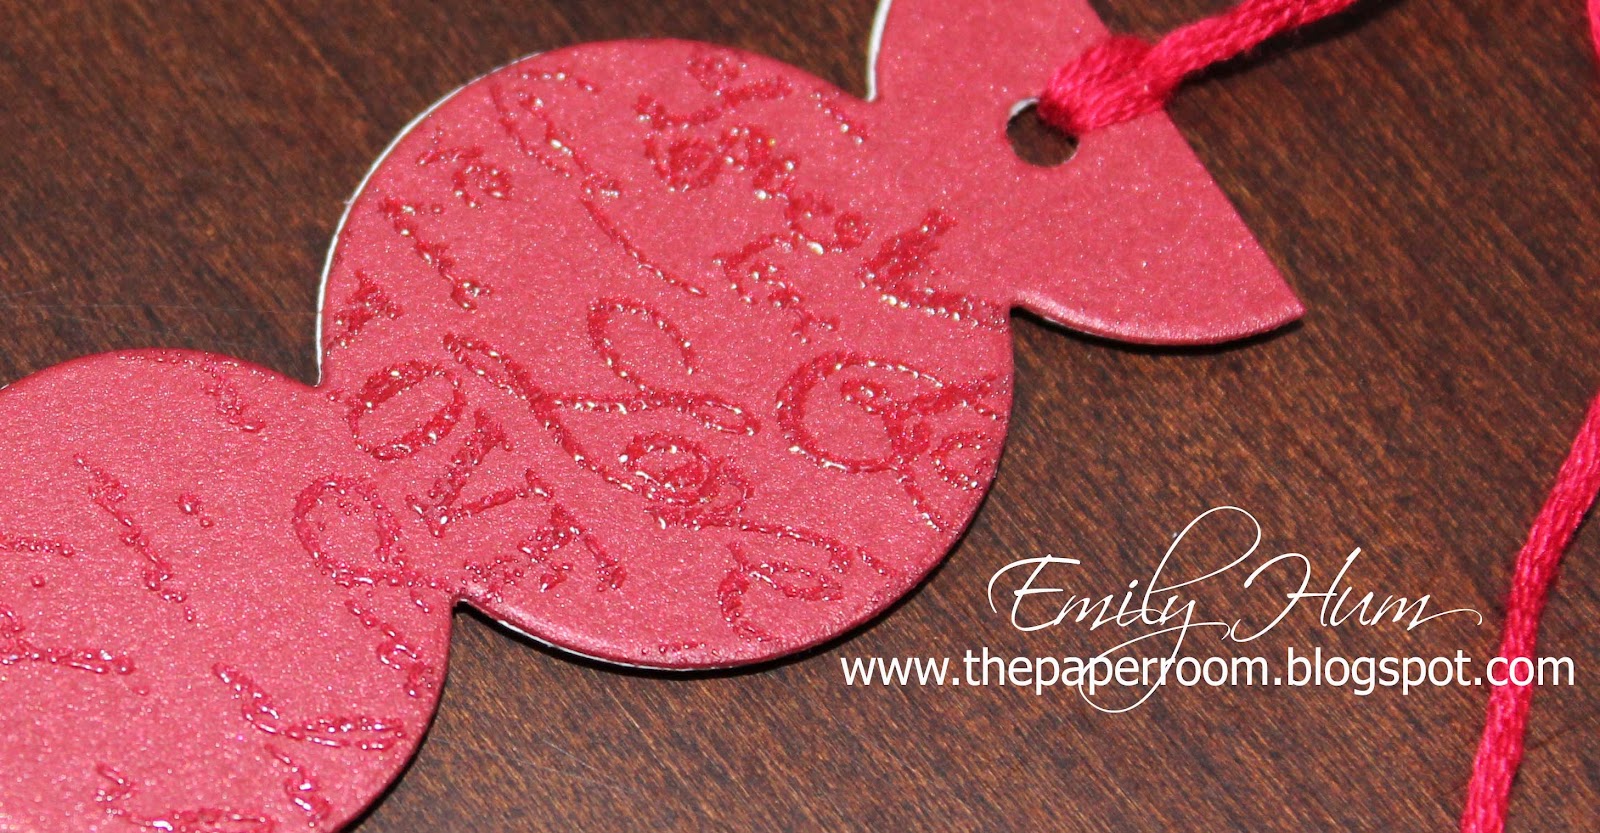
She's asked about embossing, so I thought it would be a good idea to send her some embossed cardstock.  She'd be able to see what embossing folders are out there and make a card with them :)  Most embossing folders will cover a 4.25"x5.5" piece of cardstock.  However, there are a few larger ones out there, which cover 5.75"x6.5" piece of cardstock.  As you can see, there's quite a few designs out there ... ok, I guess that means I have quite a few designs ;)


Here's a few individual shots of some of them ... hopefully, you'll be able to see the design.  I did two of each ... nope ... it's not all the embossing folders I have .  I put a limit on the number I was doing, so I wouldn't be sending only embossed cardstock :)


In line with that thought, I sent her some die cuts to give her an idea of what she could do with a machine that embosses and die cuts.


I die cut a bunch of labels using Papertrey Ink's Jar Labels 2 die and heat embossed some sentiments on them ... this way Tiffany could see what heat embossing is all about.  Of course, I had to do a few with the Photo Finish Strips die as well.  I stopped there ... I didn't want to get carried away ;)  I sent her some blank ones as well, so she could put her own sentiment by writing it, using stickers or rub-ons.


And you can't go without a little sparkle on your cards, so sent her some glitter and Stickles.  She'll be able to add that little touch of shine to her cards!  I just love Stickles ... oh, and I just love finding glitter on hubbie ... unfortunately, he doesn't feel the same way ;)


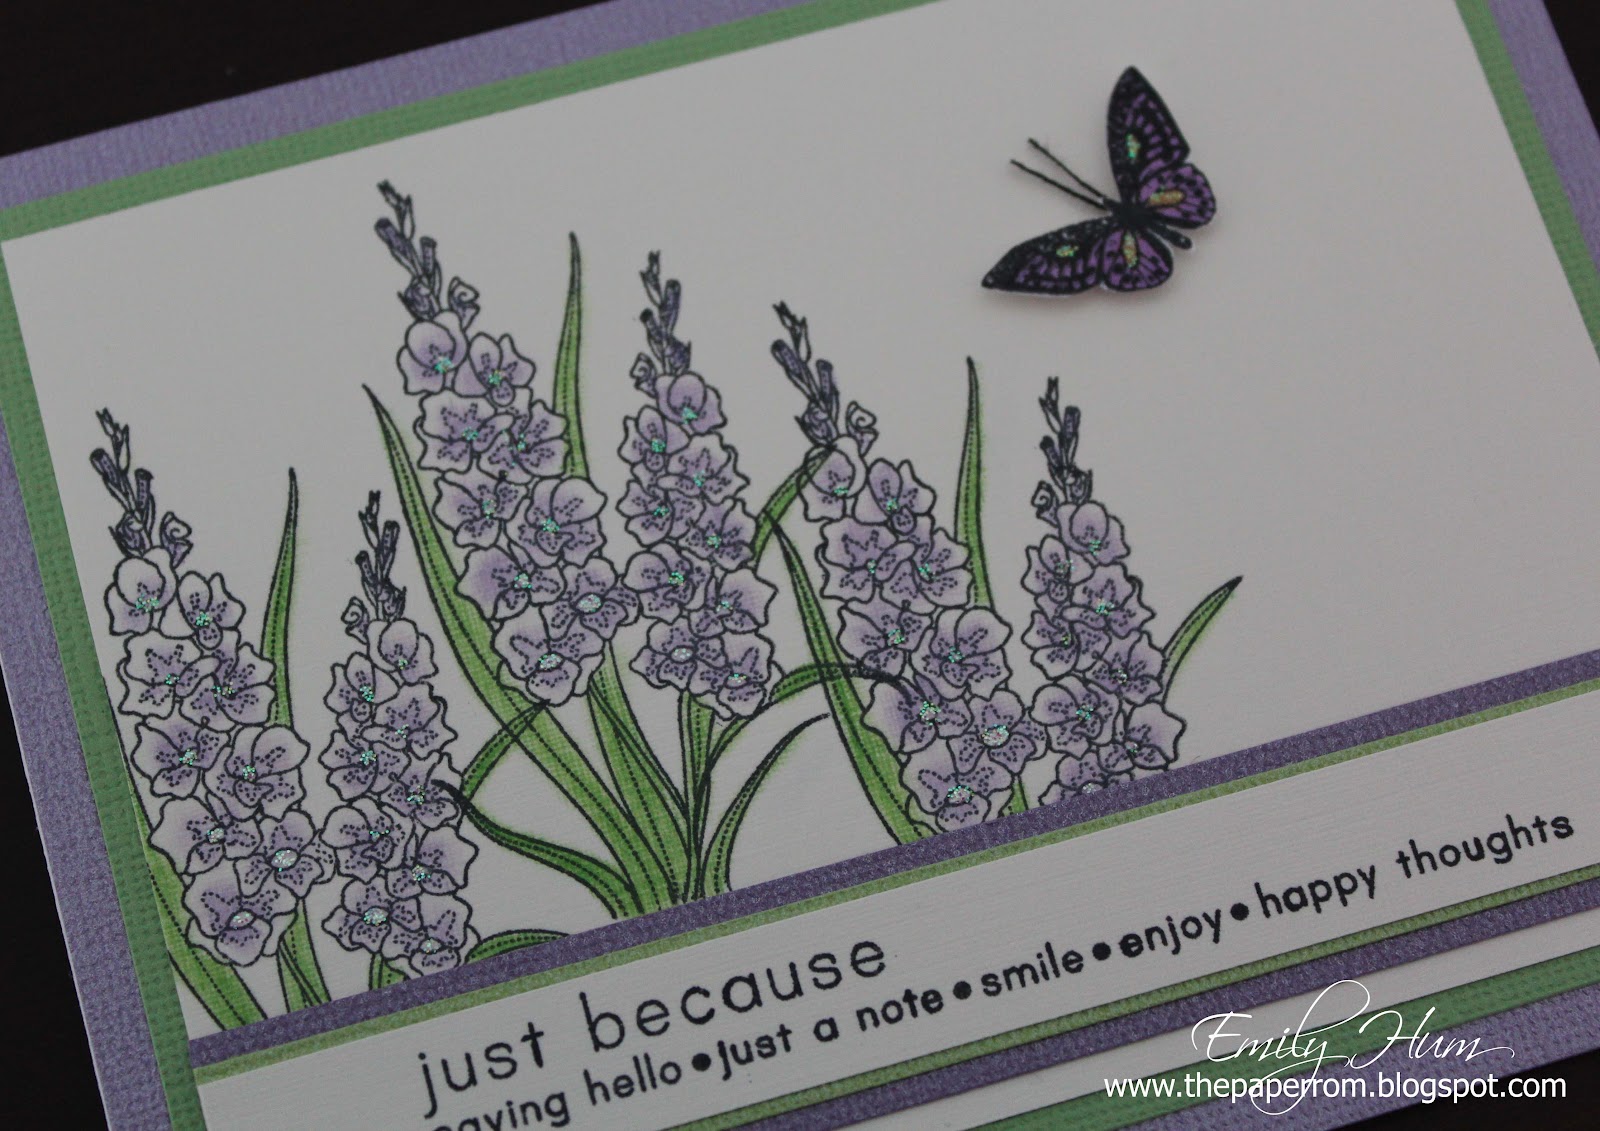
I put some Stickles in the middle of the flowers and a bit on the butterfly to demonstrate a little goes a long way.  BTW, Tiffany you don't need to cut the nozzle.  If nothing comes out when you squeeze, just use a needle to clear the nozzle. 


You don't need a lot of glitter ... I usually just put my finger on the glitter and a bit sticks to my finger ... then I just sprinkle it on.  This little bit is enough to just add a little sparkle to the card.  I usually don't put more than that.  WARNING:  You may (ok, most likely) end up with glitter on yourself.


Here's a better picture of the card.  The flower stamp and sentiment are from Papertrey Ink, and the butterfly is from Hero Arts.  I stamped the sentiment on leftover paper from making Mei Mei's wedding invitations. 

Saturday, February 18, 2012

Just a quick share ...

When I made hubbie's Valentine's Day bookmark, I had initially thought of embossing with white embossing powder.  So, I tried it out to see what it would look like.  However, I found it was too much.  Since I don't like to waste, I used the piece on a card ...


Here's a close up of it ... not bad on white cardstock.

Tuesday, February 14, 2012

Happy Valentine's Day ...

Here's the "card" I made for hubbie for Valentine's Day ... actually, it's a bookmark.  I was looking to do something different.  I got the idea since hubbie's been reading a book he borrowed from a friend ... instead of on his Kindle.  I used the circles border from Papertrey Ink and shorten it, so it would fit in a book.


I stamped with Warm Red Chalk Ink and embossed with clear embossing powder and repeated this on each circle with the different image/sentiment.


In the last circle, I stamped "forever", "&" and then "always" each separately, so it's not perfect.


I decided to do the same thing with the other side but on red cardstock for a more subtle look.  The first circle is a stamp with the word love in a shape of a heart, the next 4 circles are stamped with a script ... it's a love letter, and the last circle is stamped with a heart.  BTW, the cardstock for this bookmark are leftover from Mei Mei's wedding invitations :)


Sunday, February 12, 2012

Hubbie's homework ...

This was way too cute not to share.  Hubbie is taking a 5-week photography course, and he has homework.  In week 1, his homework was to take pictures of a bowl of fruit or something.  He took out his California Raisins and set up the stage ... litterally.  I found a set of raisins on a higher platform facing some other raisins ... apparently, there was a concert ... LOL.

In week 2, he needed to take pictures of a person.  In support, I posed for pictures ... so nothing interesting except I got to make faces at hubbie in between shots :)

This week (week 3), this is what I found when I came out ... hubbie had set up for his homework.  I like how he gave the little guy in the back a booster seat :)  In the end, he didn't use the white bear since you could not see his eyes ... glad hubbie did not decide to give him a hair cut!  He did use a clip to hold up the arm of his remaining subject ... yup, he wanted him to be waving :)

Wednesday, February 8, 2012

Getting a bit more organized ...

Don't you just love organizing!?  I do it ... I usually feel great afterwards ... sort of like a cleansing of some kind ...I know I'm strange :)  In The Paper Room, this also means more space, which means more room for more stuff ;)

Hubbie came into The Paper Room on Sunday and commented "There's a lot of stuff in this room."  Yeah, but it's somewhat organized ... at least, I think so.  I added a couple of containers to the room, so I have some more storage now.  Here's one on the desk ...


And here's the other one ... yup, it's under the table ... wha!?  One should never waste space :)  Don't worry, it's easily accessible as it has wheels like the other containers in my room .. I can just roll it out!

Friday, February 3, 2012

Some quick cards ...

Made a few quick cards with some pattern paper.  What I really wanted to do is use the Photo Finish Strips Die Collection from Papertrey Ink.  It coordinates with the Holiday Photo Finishers Stamp Set, which I have of course :)  However, I wanted to use it for other types of cards.


I didn't do anything fancy ... just picked some pattern paper from my stash ...


then die cut a couple of the dies on Neenah solar white paper, stamped a sentiment in the middle, and added a touch of Stickles to give it a bit of a shine.  I was going for something really simple.  However, I did add a butterfly on one of the cards ... it looked like something was missing.


Here's a close up of the dies ... I just love these dies!