Saturday, March 15, 2014

The Paper Room - Part 2 ...

Well, hubbie sure loves me ... there is no doubt about that!!  Not that there was any doubt to begin with ... but for anyone who wondered just how much :)

Hubbie went to Ikea many, many, many ... did I say many ... times to pick up everything from Ikea.  He picked up 4 PAX system frames, 27 drawers, 16 shelves ... as well as 2 Alex drawer units and a table top, which is my new desk.  Also, he did most of the work putting everything together ... I help a bit ... moving the stuff and putting the shelves up and some of the drawers together ... basically, the easy stuff.  Again, T-H-A-N-K  Y-O-U hubbie!!

So, here's what replace the towers of plastic storage containers.  What do you think?  Yeah, it's pretty high ... I still need to get a step ladder, so I could reach the stuff on the top shelves :)  I'm pretty happy with it!  To quote Agnes from Despicable Me ... "I'm so haapppy!!!"


This is my new desk.  It's smaller than the previous one, but it has enough space for the essentials.  I opted for a smaller desk as it gave me more room when I opened the drawers of the PAX storage unit ... it was more comfortable.


The best part of this desk option is the 2 Alex drawer units on either side that acted as the feet for the desk ... more storage space ... yaay!  As you can see, I still have a few bits to sort out ... for now, I stored it under the desk :)


Yup, lots of punches ... there are 2 more drawers :)


To the left of the desk is another PAX storage unit ... but the smaller one.  It fit perfectly there!  I'm still missing one drawer as they didn't have any more in stock.  Oh, I forgot to mention that Ikea was having a discount on their PAX system ... it was perfect timing!  Hopefully, they will get more drawers soon.


As you can see, I reorganized the closet as well.  I kept some plastic containers and added some other containers from Ikea.


I also reorganized the 2 bookcases to the left of the closet ...


I moved a few things around on my table and got rid of 2 of those containers ... you know the ones that you put screws, nuts, nails etc.  I manage to consolidate things and just keep 2.


As I mentioned, I didn't get rid of all the plastic storage containers.  As you can see, I still have a few under the table :)


As hubbie commented ... I really maximized the usage of the space I have ... he was referring to me putting some stuff in the space between the ceiling and PAX storage unit.  Wha!?  No space should be wasted!  Just like paper :)


FYI, I was able to fit a lot of stamps in those drawers.  Here's a couple of drawers filled with stamps :)


I love the flexibility of this storage unit ... I was able to size the shelf to the size of the paper ... now, I could easily reach for the paper I want.  BTW, I don't think I need to buy any more paper!!


Well, that's the end of the tour.  Hope you enjoyed it!

Saturday, March 8, 2014

The Paper Room - Part 1 ...

You are probably not aware, but The Paper Room was under renovations for about 3-4 weeks ... actually more like 3-4 weekends.  It's been a while that I've been "passively" looking for replacements for my towers of plastic storage containers.  The first plastic container I bought was starting to break down ... I guess that's what happens to plastic over time.  I figure I better start looking for some replacements; however, I still had a few years before the others deteriorated as the first one was purchase years before the ones in The Paper Room.

In January, hubbie and I went to Ikea to look at the Alex drawer unit that I saw on-line and some storage containers.  When I saw it, it wasn't exactly what I was looking for.  I didn't want to settle, so I decided to look some more and just get some of the boxes and magazine file storage from the Kassette series.  I knew I would use those whatever I decide to get.

ALEX Drawer unit with 9 drawers IKEA High unit with many drawers means plenty of storage on minimum floor space. 

As we were heading downstairs, hubbie saw the PAX system and ask if it would work.  It's a wardrobe storage system but allows you the flexibility of putting shelves, drawers, etc. as per your need.  After looking into it a bit and planning out what I would needed ... and I mean planning!  I had different versions of worksheets in Excel trying to figure out how this would work and where I would store stuff ... I even weight some of my stuff to ensure it was in the acceptable weight for the drawer or shelf.  Finally, I had an idea of how many drawers vs shelves I would need; but before we could start shopping, I needed to move things out of the room and that was a challenge in itself!  It's amazing how much stuff there is in that room!!  I think hubbie was impressed with how much I was able to store in there.  He said I'm very efficient in storing stuff ... that's a complement, right!?

For a few weeks, I had stuff in every room upstairs!  In the spare room ... and that is just one side :)


In the bedroom ...


In the family room ...


Oh actually, it wasn't every room ... nothing in the bathroom ... so not that bad, right?  You may change your mind when I tell you that I did not empty the room ... just the area where the towers of storage containers were and where my desk was :)

All this allowed me to do a clean up in The Paper Room.  All those boxes that I had from Papertrey ... I undid them and layed them flat ... now it does not even fill up the box.


I also tidy up the closet and used it as a temporary storage area :)


Look, I've been robbed!!  I don't remember the room ever being so empty!!


Let me tell you this clean up showed me just how much paper I had ... I knew I had a lot but seeing it all consolidated as I sorted through everything ... let's just say .. wow!  Oh and I have a lot of ribbon too ... that I already knew though ... more than a drawer full as that's not all of it :)


I'll end here and continue in another post ... stay tune for Part 2!

Saturday, February 8, 2014

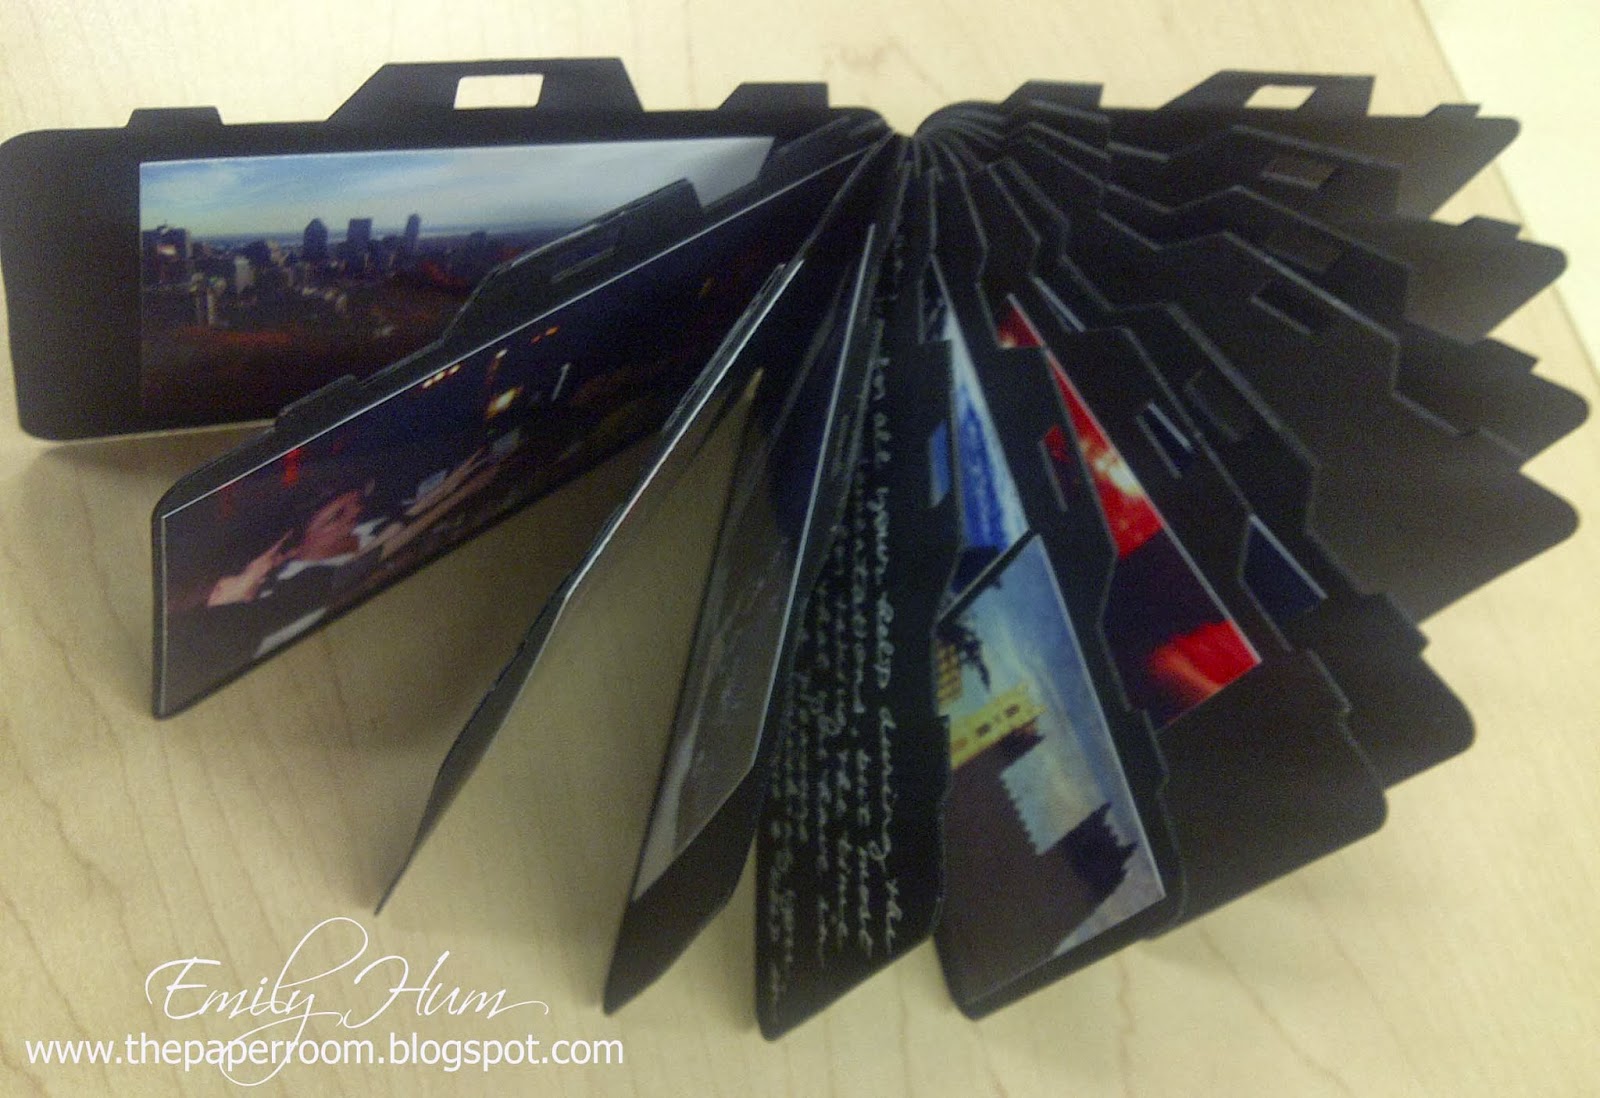
Mini camera album ...

Here's something I did for my colleague who returned to India in November.  Initially, I was just going to make a card ... however, the day before we were going to meet him for lunch, I had a flash of what I could do.  I guess I work well under pressure :)


Anyway, he likes photography, so this was the perfect thing.  I folded a piece of black cardstock and ran it through my die cutting machine ... I ended up with a bunch of "camera card pages".  I stuck the pages together, so that it would be a camera booklet.  It was fun to do ... he really liked it, which is the most important thing!


I left some blank pages at the end for him to add pictures or have others write him a little message.


I think this would be a great idea as a thank you card or mini album for a wedding!  You could put the Chinese thanks character on the lens of the camera :)

Monday, February 3, 2014

Recycling ...

Since I've been ordering from Papertrey Ink for almost 3 years now, I accumulated these plastic boxes that the old stamp sets come in.  Initially, I was going to use them to put some card sets.  However, I preferred to make a box as the ones from Papertrey Ink are square boxes, so they don't exactly fit the cards.

I have manage to recycle a few over the years as they are great boxes for gifts!  However, as you can see, I still have quite a few of them.  I've even started to put the smaller ones in the bigger boxes ... space is of a premium here ... or I should say ... I'd rather save the space for more craft stuff :)


I did use 2 boxes last year for a birthday gift ... yaay!!  I really had fun putting this together ... however, hubbie thinks I went a bit overboard ... so what else is new!?  The birthday girl likes crafts, so ... stamps, ink, stickles, rub-ons, cards, envelopes ... now, that's my kind of gift ;)


I put a sentiment on one side of the tag and an image on the other side ...


Oh and I included some stickers ... of course, I had to make an envelope since I had nothing that would fit it.  The tag below is what I attached to the gift bag.

Monday, January 27, 2014

Red envelopes ...

In November, I made 2 red envelopes as mom was attending a wedding in California.  She also asked me to make a birthday and wedding card ... thankfully, I had some already made :) 

Here are the red envelopes I made ... yeah, that's me holding it while I take the picture.  What!?  I didn't have a chance to take a picture, so I took a couple right before I met mom for lunch :)

There not the greatest pictures ... best I could do in the metro with my phone :)

Sunday, January 19, 2014

Quick card share ...

Here's a card I made for hubbie's birthday ... I never took the time to post this, so I thought I'd just do a quick post and share it.  I used the "Sun Ray" die from My Favorite Things and die cut it 3 times.  Initially, I had pattern paper for the 2 lighter shades of blue ... but I found it was too busy.  Hubbie and I are simple folk, so we like simple things :)  The sentiment is from Papertrey Ink's stamp set "Stylish Sentiments:  Birthday", and the little heart is from the "Like your Style" stamp set from Simon Says Stamp.


When I was putting it together, it reminded me of that toy where you insert in the different shapes ... as you can see ... success :)

Saturday, January 11, 2014

Boxes ...

Here are some boxes I made for Christmas.  I usually make a box for Mei Mei and Stephane and my "parents".  I put parents in quotes since my mom usually doesn't get any ... someone doesn't share ;)  So, this year, I decided to make one for her as well.  I guess I was on a roll ... I made 4 boxes :)


I didn't like the ribbon I had, so I figure I would make a belly band to hold the box closed.  I found the belly band looked kind of plain, so I embossed it with the same pattern in 3 of the boxes.


I realized that what I did not like was that the belly band was a bit too wide, so I reduced it by 1/4" and left it plain on the last box.  I think it looks much better ... gives a bit more contrast.
 

Sunday, January 5, 2014

Ketto birthday card ...

Here's a birthday card I had made for my neighbor's daughter ... never got around to posting it.  It's a bit different for the usual cards.  I still love my Ketto stamps :)


 Here's a close up of Calliope Ketto ...


I was looking at my Ketto stamps as I was writing this post ... I thought ... hmmm, I should make a bunch of cards using the different Ketto stamps as I didn't think I used most of them yet ... wrong!  I actually used quite a few of them ... there's only 3!  I must admit I heard hubbie in my head asking me if I used all the stamps ... my usual answer is ... too many stamps not enough time ... work just gets in the way of my hobby :)

However, it would still be a nice project to make a bunch of cards with just these Ketto stamps ... going to add that to my to-do list!

Wednesday, January 1, 2014

It's 2014 ...

Happy New Year Everyone!!

Just a quick note to wish everyone all the best!!  Wishing you health, happiness, and all that good stuff ... which of course includes lots of crafting time or time for things you enjoy if you're not a crafter :) 

I just can't believe it's 2014!!  It's crazy how quickly time goes ... well, I guess all the more reason to enjoy what you are doing or should I say do what you enjoy ... you know what I mean!

I'm looking out the window, and it looks nice and sunny this morning ... this is of course misleading as the outside temperture reads -17 C!  A good day to stay inside and do some crafts :)  I hope whatever you do today, you are having fun and keeping warm!  Enjoy your day!!